Sunday 30 October 2022

Felicia, Blinded

So I finished reading Masterful Color and was ready to put some of its ideas into practice.  Today's model is Felicia, making her fourth appearance.  In fact this is a different view of a pose I've painted before.

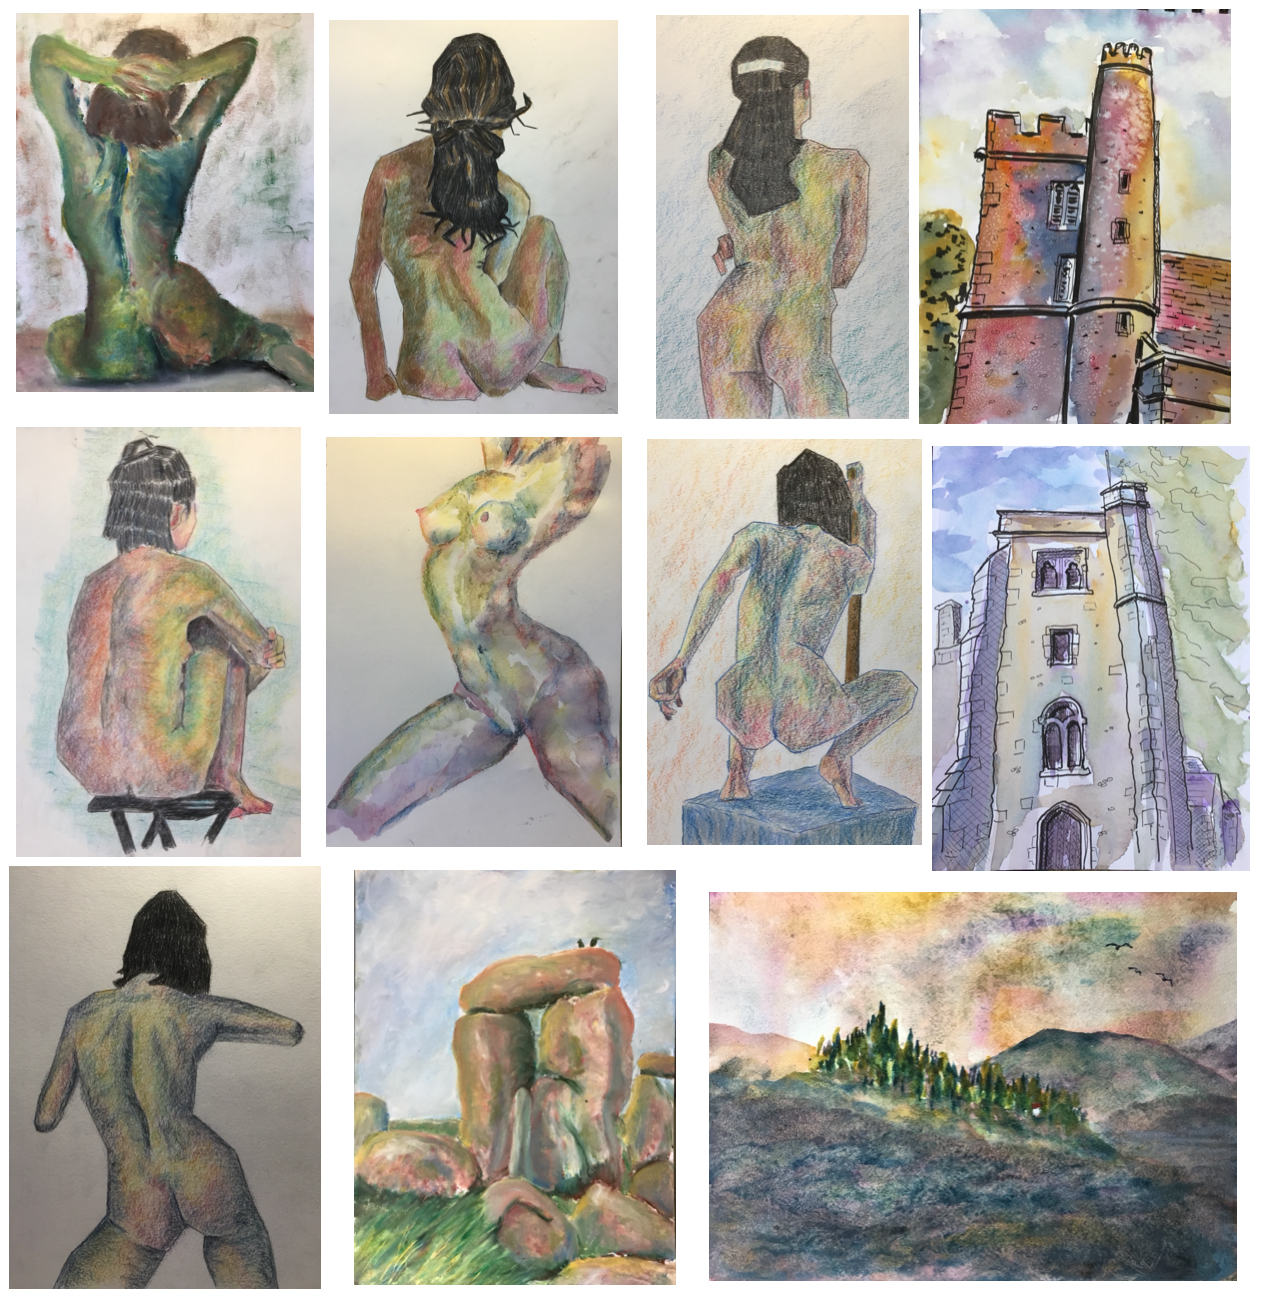
Following Arlene Steinberg's recommendations, I started with an underpainting of complements.  I wanted a green background to contrast against fleshy tones, so put a red background in the underpainting.  And because blue-purple was the closest I could get to a complementary colour to flesh tones, I put in the dark values on the body in blue-violet.  I also put on some indigo in the darkest areas and some cool blues in parts of the body that I was intending to make redder.

In the underpainting, most of the colour was applied with sharp pencils moving in small circles (another book recommendation) although I also added some colour with the side of the lead where I needed less intensity.  I added several different layers to the hair too - I wasn't going for the pure black look today (book recommendation).  Here's the underpainting I ended up with:

The background ended up with just three layers of pencil colour.  The first layer was red, three similar but different reds in horizontal bands, blended together.  The second layer was green, six different greens in upward sloping bands from lighter greens at the top to darker at the bottom, all blended together.  And the final layer was yellow, a warm yellow in the left and cool on the bright, blended together where they met above the head.

After the initial underpainting, I added layers of red and green to the hair.  It was liking close to black after this, so I stopped on the hair at that point.

On the body, I applied several layers, generally alternating between realistic flesh colours and the blues and purples with which I'd marked out the darks.  Occasionally I would throw in some impressionistic reds, oranges, greens and blues where I could see them in the source photo.  Most layers were scribbled in small circles but occasionally (and every time for the impressionistic colours) I'd use the side of the lead if I didn't want full on colour.  I found myself getting a bit frustrated at how the flesh colours (like ivory, cinnamon and coral) weren't turning the purple in the underpainting into a neutral colour (so the purple can't have been the best complement) but I eventually found that raw sienna neutralised the purple.  So I put in a layer of raw sienna.  I was careful to leave light areas untouched by the raw sienna to prevent it overpowering the painting.  And flesh colours would have gone on top of the raw sienna at some point.

When I was finished, I burnished the flesh and hair with a colourless burnishing pencil (as per the book), not bothering to sharpen it when it went blunt (book again) and wiping all the burnished areas with a cotton wool makeup remover pad (yeah, book).  I didn't burnish the background because it looked great as it was and because the figure stood out against it.  Oh, and there were examples in the book where Arlene burnished the subjects but not the background.

It might be worth me saying at this point that the book tells me to not stop adding layers until there's no white of the paper showing and that I ignored this instruction!  I quite like how there are white flecks showing off the tooth of the paper.

And that was me done.  This took a lot longer than my normal paintings.  It probably took four or five hours, so I'd have to speed up if I ever made it on to Drawers Off and wanted  to do a painting like this.  But never mind that, the Arlene Steinberg book has both given the quality of my coloured pencil paintings a sudden step up and opened up a new direction in which I can keep improving.  This one's definitely going up for sale and I'm excited about continuing to paint in this style and to get better.

Saturday 29 October 2022

Masterful Color, Vibrant Colored Pencil Paintings Layer By Layer: Arlene Steinberg - Book Review

Ok.  I've been looking for a while for a book on coloured pencils that was suitable for a complete beginner after the Encyclopaedia Of Coloured Pencil Techniques left me feeling a bit let down.  I found this 144 page paperback by accident while googling around and it sounded as if it might be the book I needed.  But was it?

The book can be divided into two parts.  The first third is a beginner's introduction to coloured pencil and the rest of the book is a series of demonstrations.

In that first third, there's a chapter on how to use coloured pencils, then a couple more chapters on composition and colours/values.  I didn't learn much from that second and third chapter but I don't begrudge them being there.  One of the points I keep making about beginners' books is that they need to take the reader on a journey, and I don't think these chapters could have been left out.  The concept of complementary colours is key to the demonstrations and compositional planning is included in the  big demonstration at the end of the book.

That first chapter, though, is excellent.  I learned more in that first chapter than in the whole of the Encyclopaedia Of Coloured Pencil Techniques.  I learned about so many things that I've been doing wrong.  I've been holding my pencil too near the point.  I've been filling in areas by shading with the edge of the lead when I should have been scribbling  faintly in very small circles with a very sharp pencil.  I've been burnishing with a sharp pencil when I should have been using a blunt one.  I could go on.  Suffice to say, it's off the charts.

And then we get to the demonstrations.  There are 14 normal demonstrations followed by one huge demonstration that includes thoughts on composition and where the final painting is a combination of several of the individual paintings.  I have so many comments to make on these demonstrations that it's difficult to string them together into a discourse, so I'm going to give a list of bullet points:

- the demos are an important part of the book, introducing the idea of using pencils in multiple layers

- the colours to use in that first layer depend on what the final colours are going to look like.  This is the big idea idea in  the book.  The first three demonstrations discuss red, yellow and blue subjects.  These all require different colours in the underpainting, so all needed separate demonstrations.

- each demonstration has six or seven steps and each step can involve adding up to four or five layers to different areas of the painting.  There's a big lesson there about how many layers to add.

- the demos are prescriptive.  Too much do this, do that and not enough I did this, I did that.

- in particular the demos are very prescriptive about what colour pencils to use.  People who religiously follow the instructions are complaining about having to buy new pencils to be able to follow the demos.  Those who are happy to use similar but different colours or those (like me) who are happy to read and learn from demos, then do our own paintings are more chilled.

- the most useful bits of the demos (in my opinion) and at the very beginning and at the end.  The middle steps, where Arlene tells us to layer over this green and then this red I take with a pinch of salt.  In reality, surely you look at the coloured area, then decide what colour you need to lay over next rather than just following instructions?

- I thought there were too many demonstrations.  About halfway through them, I was switching off and skim reading.  I'd got the general idea about how to start and finish a painting and that the bit in the middle was all about adding multiple layers.

- The reason for there being so many demos was probably that the later ones got more complicated with glasswork, metal bowls, china cups and other textures.  At this stage of the book there seemed to be a big jump in realism and I think the book could have benefited from more discussion about the techniques to use in painting all those different textures rather than just showing us more demos with not much help apart from telling us to paint what we see, not what we think we see.

- a minor point but the demos all told us to spray fixative on the finished paintings.  I thought this was something that was only required for oily pencils and not for waxy ones like my Polychromoses.  If this is the case, then Arlene should really have told us this, what with this presumably being a beginners' book.

The book as a whole (including the demonstrations) is very much focused on still life paintings.  This is a subject area that's not that interesting to me but I'm not complaining.  I bought this book to learn how to draw with coloured pencils, not to copy all the examples.  And still life gave Arlene ample opportunity to dig out the red, yellow and blue (and later white, metal and glass) subject matter that she needed to illustrate her advice in the demos.  I'm actually looking forward to applying the techniques in this book to figures, portraits and even landscapes.

This is definitely a good book and is the one that I'm pointing anybody towards if they want an introductory coloured pencil book.  Provided either they use Prismacolour pencils or they're smart enough to be able to read Prismacolour pencil demos and apply the lessons to their own paintings using their own brand of pencils.  It's a tough call on how to grade this one though.  It's a good book so definitely worth three palettes.  But I was frustrated in the final third by having too many demos and not enough explanation of how to paint glass/metal/china, so it's definitely not a five palette galactico. It's between three and four palettes, and I'm going to round it down.  Remember three palettes is a good score.  And that this is the best beginners' book I've seen on coloured pencils.

🎨🎨🎨

Wednesday 26 October 2022

Neil McCarthy

Neil McCarthy (1932-1985) was one of those actors everyone recognises but whose name nobody knows. I saw him in an episode of Some Mothers Do 'Ave 'Em the other day and decided that his chiselled looks would make him a great subject for one of my coloured pencil drawings.  A bit of research reveals that his looks were down to his acromegaly, a disorder resulting from an excess of growth hormone long after growth plates in the bones have closed.  It results in enlarged hands feet, fire head, jaw and nose.  I wasn't surprised to read that Richard Kiel also had acromegaly.  There's also someone I know in the business world who reminds me of these two actors who may also be a sufferer.

Anyway, this was one where I followed my usual techniques.  A pencil drawing first, using a grid, then some filling out with a dark colour to get all the edges and shadows, then lots of saturated colours where I could see them, then some neutrals and finally the burnishing.  After seeing Liz Chaderton on YouTube starting a watercolour portrait with a purple underpainting, I used a blue violet for my filling out.  I then followed up with reds, greens, yellows and blues.  Then browns and greys.  And I burnished all the flesh and clothes with white.  I didn't burnish the hair, preferring the tousled look which I'd built up over the course of the painting by first shading then scribbling in with most of the colours I'd used everywhere else.  Finally I did some tinkering, adding some outlines and a faint grey background and adding a little colour to the face in places.and then I was done.

I don't mind what I've ended up with.  The likeness is there and the acromegaly is definitely coming through.  I just wonder whether I shouldn't have bothered with the outlines though.  And the head seems separate to the t-shirt and shirt.  Neil doesn't make it to the shop window, I'm afraid.

<Edit: Neil was later used for a dummy run with coloured pencil solvent>

Sunday 23 October 2022

Stephanie R

I'm finding it hard at the moment to get the time to paint but I'm determined to take advantage of any opportunities that come my way.  I'm not going to spend my retirement watching day time quizzes on the telly.  I got an opportunity this afternoon, so reached for the inktense pencils and picked this pose by Stephanie R, making her debut on this blog.

I copied the colour scheme from Wake Up Kevin, starting with a monotone drawing in bark,  then adding in chilli red, Shiraz, iris blue, teal green and leaf green wherever I could see those colours in my source photo.  And I strengthened and livened up some of the darks with deep indigo.  I was worried that the amount of bark that I shaded in all over the photo might make things muddy but they generally came out OK.  The legs underneath the book weren't recognisable as part of the body after the first wetting because of a black of green, so I put more green over them and reset them.

But there are too many things about this one that I don’t like for it to be allowed anywhere near the shop window:
- the bit on the outline of the skull that points inwards near the eye has disappeared
- the legs now look like part of the body but that's only because of the colour: the shapes look wrong
- the hair looks cut and pasted in
- the shadows on the arms are too hard-edged
- the hands, which looked OK in my initial drawing, have lost definition amid the brushwork

So, yeah, a flop this one.

Friday 21 October 2022

Upchurch Art Exhibition, 8-20 November

From 18-20 November, some of my work will be exhibited at St Mary's Church, Upchurch, Kent.  The exhibition from 10 to 4 every day.  There's a £2.50 admission charge, kids get in for free.  The works will all be by local amateur artists and I'm expecting most, if not all, will be up for sale.

After having a ponder, I've decided that I'll be exhibiting these ten paintings.  There's an abstract feel to a lot of them but I'm expecting to be up against a lot of landscapes, so thought I'd be a bit different.

All ten of these are reserved for the exhibition now and not up for sale until the exhibition is over (unless,of course, they're sold at the exhibition).

If you're local, do come along.  It's a bit of time outside the house and there will be other artists' work to look at as well as mine.

Wednesday 19 October 2022

Shirley

Another house in the village but this time I've not been approached by the owners to paint it.  This one's a housewarming gift.  The guy that's had this dream house built was horrified at the slow internet speeds in the village so got everyone in the village to sign up to receive some sort of credits that meant that the infrastructure could be put in place for fiber internet all over.  It took a lot of energy on his part and the rest of us were too apathetic to get anything done, so he's definitely earned this painting and I'm hoping that once everyone knows who he is (they only moved in about a week ago) that he'll not have to buy his own drinks in the pub for a while.

This one started off as a drawing with the fineliners.  It doesn't count as a dash & splash, though, as I didn't do the drawing en plein air and as I picked out sensible colours rather than randomising.  This was my first go at using the fineliners on cold pressed paper.  It felt harsher on the pens than the hot pressed I've been using to date but that's just a sacrifice I need to make if I want watercolour paints to work properly.  One thing worth mentioning about the drawing is that I messed up the perspective on the nearest downstairs window, with its bottom edge sloping upwards to the right rather than downwards.  I tried  to cover this up in the painting stage and by adding new pen lines at the end.  It's harder to spot now.

For colours, I chose Winsor red, French ultramarine and raw sienna.  Two of them mix together to a brick red and the three of them can get to a decent black.  These are the two main colours of the house - it's all brickwork and black wooden cladding.  I ended up using some transparent yellow later in the foreground and cadmium yellow in the spatters.

The sky went on first, both in the sky itself and in the windows.  Obviously I couldn't just use the blue, so threw in the red and some raw sienna.  I used hitchin paper to blot out some clouds in a way that left the rest of the sky looking good.

Then the rest of the house was all about multiple layers.  All three in the roof but with a blue bias, all three in the black areas, with a mix going towards black and red and yellow in the brickwork with a tiny bit of blue.  In all three cases, my washes weren't uniform - I made different component colours stronger in different places.

I also used all three colours in the greenery but found that my red and yellow weren't producing a bright enough green for my tastes, so I used some transparent yellow in there to brighten things up.  I added some blue and red grassy tufts with the Merlin brush to keep things interesting.  I couldn't just make the grass green after not making the wooden cladding black.  It's either realistic colours everywhere for me or impressionistic everywhere.  Not that I use realistic colours often.

As finishing touches, I added birds and bricks.  And corrected the bottom of that window.  And then I was done.

They weren't in when I nipped round to surprise them, so I headed out to the orchards where they were walking the dog.  I introduced myself and they knew straight away I was the local artist.  When I handed the painting over they seemed genuinely touched.  Job done and a well deserved house warming present.

Sunday 16 October 2022

Number Eighteen

I was approached a week or two ago by a guy on the village who said he'd be interested in buying a painting of his house if I ever did one.  I finally found the time to do it this weekend and here's what I came up with.  I had a sneaky photographic reconnaissance trip during the week and quickly decided that the most interesting view would be one like this with the two trees framing the house.  I had to get down low to be able to see a gap between the tree and the top of the house, so this is an upward looking photo and the perspective vanishing points (of which there's only really one, on the left) are above the horizon.

The main three colours today were Mayan blue genuine, quinacridone magenta and Indian yellow.  Cadmium yellow (also warm, like the Indian) was used in all the leaves on the trees and for some tiny flower heads on either side of the front door.  And cadmium red also contributes some flower heads.  So this is in the key of triadic left.  The idea was to make things warm and sunny by having cool blues and reds in the shadows and a warm yellow for a bit of sunlight.

As usual, I put down a pencil drawing and reserved some whites with masking fluid.  I also put on a little spatter of masking fluid to make things look a little windy and to reinforce the impression of the house being high up (it does have good views out the back).  After that, I got to work on filling shapes.

For the roof and wall shapes, I started with mixes of all three primary colours that I thought approximated the real life colours, and then charged in drier versions of the individual primaries while it was still wet, generally using the yellow in the sunniest bits and the blue on the darkest.  Afterwards, I glazed over both shapes with the same mixture, maybe with a tiny bit of charging.  For the brickwork, I wasn't entirely happy, so laid over some kitchen paper to try to dry it.  I was shocked to take the paper away and see that it had left the impression of brickwork.  That was a lucky break.

The trunk of the tree was where I had the most fun, not mixing anything on the palette but just putting on all three primary colours, allowing them to mix and occasionally charging in more of the three primaries.  At the bottom of the tree, I didn't have any sort of line separating the tree from the grass - I just dragged the tree colours out into the grass and everything just blended together.

Next came the leaves of the trees.  Here I just squeezed out some dry cadmium yellow and Mayan blue genuine and stabbed them onto the paper with the Merlin brush.  There are some great greens in there but these just emerged naturally as the blues and yellows mixed on the paper and as the blobs of blue and yellow on my palette became more contaminated.  I also stabbed in a little quinacridone magenta to keep the greens under control and brushed in the odd branch.

Then it was time to add the shadows.  I mixed the Mayan blue and the quinacridone magenta and watered it down to get my shadow colour.  When I added the shadows to the house, everything burst into life.  It was as if the sun had come out.  Watercolours can be amazing.  My final step was to stab in some cadmium red and cadmium yellow flowers in the pots on either side of the front door.

I'm more than happy with this.  Everything stands out against the granulating sky and the cadmium yellow helps the trees stand out against the houses.  The colours in the tree trunk work brilliantly.  Burnt umber must be really worried by now about its place in my palette.  The worst thing about this one is the roof of that building on the far right.  It's too dark, drawing too much attention.  When I frame this one and things get slightly cropped, I'll be losing as much of that roof as possible.

The owners loved it and bought it.

Sunday 9 October 2022

The Wood Of The Dead

It feels a while since my last painting but it's only been a week.  My excuse is that I've been playing in a correspondence chess tournament.  I also have other things coming up this week (new glasses, a couple of jabs, a new computer to set up) so thought I'd better do some painting today.  It's a bit chilly outside and the day will soon come when I put away my paints for the winter and only use indoor media.  I didn’t fancy long spells outside, so went for an abstract landscape, where I wouldn’t need to be especially careful with the details.  I was inspired by a YouTube video by Steve Mitchell, but my techniques ended up diverging well away from his.

For colours, I went for some underused gems.  Cobalt blue (not in my regular palette), green apatite genuine (not yet shown its class), hematite violet genuine (ditto), cadmium red (because it granulates) and raw sienna (my least used yellow and a granulator).  All five colours were granulators and I wanted to start with a watery underpainting that let them all show off their granulating talents.  Cadmium yellow and titanium white made appearances at the end, and not just in the spatters.

I started with some random spattering with masking fluid.  I included some horizontal lines around the horizon after seeing Steve do something similar.  And then I sprayed water over the paper and put on some colours.  I was hoping to see some "roots" appearing at the bottom but instead I got dribbles.  I tinkered around too much at this stage and things got muddy.  I did get a good sky colour and some green tree shapes with blue tree shapes behind them but I could see very little of the individual colours.  Raw sienna, in particular, was shouted out of the conversation.  And I didn’t get any good granulation patterns.

After that, I put on two or three layers of paint on an attempt to turn this one into something recognisable. This was easier for the top half.  It only took a couple more layers to bring out the trees.  Some dabbing with dry paint (cadmium yellow, hematite violet genuine, green apatite genuine and cobalt blue) resulted in some pretty good looking trees.

The hillside, though, that was another matter.  It started muddy and it stayed muddy.  I tried to use the cadmium red and cobalt blue to add some colour, thinking their opacity might help.  Didn’t really work.  I blotted put a diagonal path up to the trees and made several attempts at painting in steps.  That didn't really work either.  I tried using salt in several of the layers.  Nope.  I added some white grass with the Merlin brush and a hill for it to sit on in cadmium red.  Looked wrong.  So in the end I gave up and spattered on some titanium white, cadmium yellow and cadmium red.

So this ended up as a big flop, although the trees look good and a cropped painting might work.  It's not going in the shop window.  The title of the painting is from an Algernon Blackwood short story.  Pines was an alternative Blackwood-inspired name but I think I'll save that name for a better painting.

Saturday 8 October 2022

Summer 2022 Poll Results

I messed up slightly with this poll.  About half the paintings in it were of naked figures and I think this is why 26 of the first 40 people to click on the link closed it without voting.  Polls For Pages only allows me to see the results from those first 40 people (unless I wanted to fork out £39 for this survey or £76 for as many surveys as I want in the next twelve months) so the survey's effectively closed after 14 people have voted.  And I'm one of those 14.  Maybe next time I need to warn people first or have the nudes as a separate question, with the option to just skip them.  Anyway, what's done is done.  Here are the results.

First, these paintings didn't get any votes:
I didn’t vote for any of these, so I can't complain that nobody else did.

Then these paintings all got one vote:
Not sure about the top left but the votes for all the other nudes were mine.  The coloured pencil nudes with their less revealing back views seem to be just as unpopular as the more revealing inktense pencil paintings.  Still, both are great fun and make a change from landscapes.  There's also only the one vote for each of the two oil pastel paintings in the survey and one of those isn't even a naked figure.

On to the two vote paintings.  These all got at least one vote that wasn't from me.
Those four nudes are the only ones that anyone else voted for (unless it was someone else that voted for the oil pastel one in the last set).  Some dash and splashes starting to appear here, so they're more popular than the figure paintings.  Two of the conventional landscapes (top right and second top left) seem to stand out as superior to the rest when shrunk down like this.  But the real thing jumping out from these is the greenness of everything.  That's more about what I've been doing this year than it is about the survey results.  But it's still a surprise.  I've never thought of my paintings as being particularly green but there you go.

Three votes for all of these:
A strange set of results, with three landscapes and two dash & splashes scoring more highly than some of their cousins in the previous set that I thought were better.  But the main message here is that there are at least two people who like my coloured pencil portraits - I need to do more of these during the winter.

Four votes for these.  Four votes doesn't normally count as giddy heights but with just 14 visible voters, it's feeling that way today.
These are looking better than the last set.  One of the things that catches my eye about them is the moody looking skies.  Looking back up the page at other paintings, this seems to be a theme that's been coming through during 2022.  It's not only when I'm using the tundra or shire supergranulators either - I've been putting weird colours in the sky when I've been using my conventional watercolours.  Again, nothing to do with survey results.  And, on a separate subject, interesting to see the most abstract painting in the survey scoring so highly.

Then we have five votes these three:
Three paintings with hills in them, two of Black Rock Cottage and two in tundra colours.  There are messages there.  I'm already wondering whether I should do a third painting of the cottage at some point using shire colours.  It wouldn’t look very Scottish but might be interesting.  The skies are worthy of attention again.  Even the one in the top left, with its more conventional colours, looks decent.   While I've been experimenting with crazy sky colours, my sky painting generally may well have improved.

And finally, a big jump from five votes to nine for this one:
Any, you know what?  I'm not surprised this one came out in top.  It's the sort of painting that always does well in these polls.  Colours not too adventurous.  Idyllic, chocolate boxy scene.  My favourite bits are actually the hanging baskets, the purples in the nearest white wall, the shadows across the road and the car in the bottom corner.  Lots to like about this one and it is now up on the wall inside that cottage.

People are, of course, welcome to keep voting in this poll or any previous polls.  Remember theSummer 2022 poll is effectively closed as I've exceeded my Polls For Pages limit.  Here are the links to all of them:

Sunday 2 October 2022

The Summer 2022 Artistic Actuary Poll

I'm needing some help again please.  It's been a busy Summer and I already have another 50 works that I'd like to put t the vote so I've set up a Summer poll.

Voting should only take a couple of minutes.  If you click on this link, you'll see 50 works.  All you need to do is highlight all the ones you like and then click on Send at the bottom of the screen.

All responses are appreciated, and I'll put the results up here when votes have dried up.

Black Rock Cottage, Glencoe In The Key Of Purple Cool

So, as promised, here's another painting of Black Rock Cottage, but this time using more conventional watercolour.ours rather than the supergranulators.  Because that this is a whitewashed building, the colour scheme is a no brainier.  Quinacridone magenta, French ultramarine and transparent yellow male up the all conquering purple cool combination.  Titanium white also made an appearance, just tidying up some white edges.

I really went to town on this one.  With the supergranulating colours, I needed to keep things quite watery to get the granulation patterns but now, with conventional watercolours, I could use multiple layers and build up some dark values.  Apart from the shadowy wall, I think everything here has used multiple layers, with some quite random colours going on.

For the roofs, for example, I started with fairly random yellows, reds and blues which I left to dry before mixing a reddish brown and glazing it over the top.  With the sky I threw on the blue and red fairly randomly before dabbing out some clouds.  The hills are a mixture of multiple random glazes with some dabbing and the odd bit of deliberate darkening around the chimneys in an attempt to get them to stand out.  For the greenery, there were the random glazes and some flicks with the Merlin brush to create grassy textures.  No dabbing though.  And for the sunny wall facing us, I went through a process several times where ai put on some random watery colours, wet them more to make them run, then dabbed most of them out.

And that was pretty well it.  Just as I was packing away I realised that my brown glaze over the roofs had wiped out the roof windows, so I added these back in as a last step.

Overall, this isn't too bad and looks good from a distance, even if those roof windows stand out a bit too much for my liking.  And I don't think it's my best multicoloured sunny white wall.  But it's going up for sale.

Comparing this to the same building in tundra colours, I prefer the tundra version but that's mainly down to the roof windows.  In terms of colour scheme, they're just different and hard to compare.

Saturday 1 October 2022

Black Rock Cottage, Glencoe In Tundra Colours

I promised people on LinkedIn that I'd start posting my artwork up there.  Yesterday I put up my first figure drawing since retirement and it was taken down within ten minutes for breaking LinkedIn's community guidelines.  Fair enough.  I assume this means that anyone posting up Botticelli's Birth Of Venus will get the same treatment.  Either naked figure paintings break the rules or they don't.  Anyway,  I felt the need to go back to landscape painting today so that I could post on LinkedIn so I've been shivering away out in the garden painting this.

It's a cottage somewhere near Glencoe up in Scotland.  The big attraction in this one was that bright white wall facing to the left and reflecting bright sunlight.  I made two changes to the scene, removing some telegraph poles and shortening the mountain at the back so that it could fit on the paper.

It was a tough call over what colours to use for this one.  In the blue corner were the tundra colours, capable of making everything look cold and keeping colour saturation low.  In the red corner was the key of purple cool, now established as my go to colours for buildings with white walls.  I decided to go for the tundra colours (plus rose dore) just for the low saturation levels but may well repeat this painting tomorrow in the key of purple cool, hence the long name for this one.

With all the shapes in this one being quite simple, I put down an initial pencil drawing without using a grid.  I also didn't use masking fluid to reserve the (really important) whites.  I trusted my brushwork instead and I think this worked.  Then I put on all the colours, working from top to bottom.  I tried to keep things quite watery to allow the supergranulating paints to do their thing.  For the hanging baskets, I stabbed in dry rose dore and tundra green rather than following my usual path of using cadmium red and yellow.  With that side of the building in shadow, I thought the cadmiums would look too bright to be realistic.  Where the horizon line was looking flat and boring, I added some trees in tundra blue.

I stopped when I reached the painting you see here.  Did I stop too early though?  I was wondering whether the roofs needed an extra glaze to darken them to make them stand out against the background, probably a glaze of rose dore.  It all depends whether, like an artist with good discipline over value patterns, you see cottages blending into the landscape as a bad thing or, like Kevin McCloud of Grand Designs, you see them as a good thing.  In the end I left the painting as it was.  If in doubt, stop painting.

I even didn't add any birds.  There's no sign of life in those cottages, so I didn't want any sign of life in the sky.

In the end, I think I've come up with a good painting and it's going up for sale.  Maybe the values of the roofs are too low, maybe that background hill on the left is too blue.  But, no, overall this is pretty good.